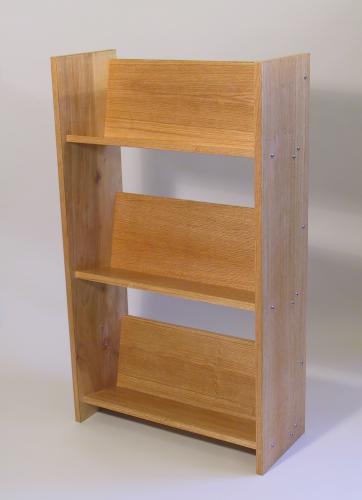
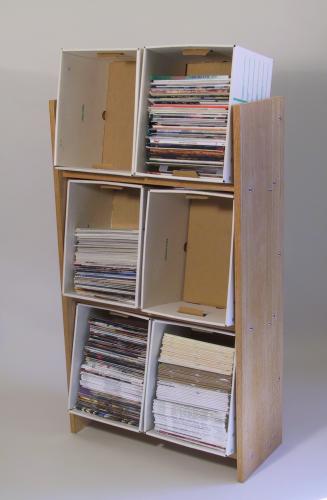
Packrat's Magazine Rack
 I have been doing very badly in my self-appointed task of documenting the furniture
I've been making. There really isn't any excuse for this since my recent output has been so
sparse. By way of making up for this lapse in updates I present this example of the
bodger's art.
This is not what anybody would call a stylish or pretty piece but it serves the purposes for which it was created admirably as it both used up a piece of plywood which was hanging about the shop taking up badly needed space and it solved an ongoing problem in my home.
Since I've been young, I've been a collector. No, make that packrat since the term "collector" suggests that there is something truly meaningful behind the accumulation. In particular, I tend to collect magazines and catalogs. When I moved from Alaska I managed to part with most of a 22-year collection of computer magazines but since then I've continued to collect woodworking and aquarium magazines at a good clip. My hoard of magazines eventually winds up in cardboard filing boxes and once they are there they aren't much of a problem. But during the filling of the boxes they tend to get in the way. I designed this rack to take care of that problem.
 Since I had the best part of a sheet of ⅞ oak plywood (it
had an 11-inch closet shelf ripped from it leaving about 37" of width) hanging about in the
shop and since I don't really like the look of oak and since this piece will spend its life
in a closet the design criterion became to hold as many file boxes as possible while using
up the plywood. The final result is 48 X 28 X 12 inches and holds six filing boxes canted
back at an approximate 10° angle to keep the stacked magazines stable. The construction
is stout if not elegant. The shelf components have a shallow shoulder at each end producing
thick tenons about ⅜-inch long which fit into "L"-shaped stopped dados routed into
the vertical members. Each pair of shelf components are joined together with four unglued
"biscuits" and three woodscrews so that they may be disassembled. Likewise the shelves are
screwed into the vertical sides rather than being glued. The screws are 3" stainless
decking screws fitted with trim washers to ensure continued strength. The finish is simply
a coat of sanding sealer and a bit of wax.
One bit of construction trivia that might be interesting is the edging on the plywood. Since the material was thicker than the typical ¾" iron-on edging would cover I was forced to improvise. There wasn't a suitable piece of oak in the shop from which to make the edging so I resorted to a rather scary kludge: I ripped the edging from the left-over plywood, paring the stock to a bit under a sixteenth to take off the oak skin and just a bit of the underlying poplar ply. This was then glued onto the exposed edges of the plywood. Ripping stock so thin is a a nervous proposition even with magnetic featherboards holding everything in place and fairly well shielding the blade. The process did manage to finish off most of the remaining plywood, though.
This website does not use cookies or javascript and collects no user information.